For a while now, I’ve had an interest in playing with IoT devices to do interesting things. I consider myself a novice (at best) with electronic components, so I wanted an all-in-one unit to get started. I recently borrowed an Azure IoT DevKit, which has lots of interesting little sensors on board, and a lot of getting started resources.
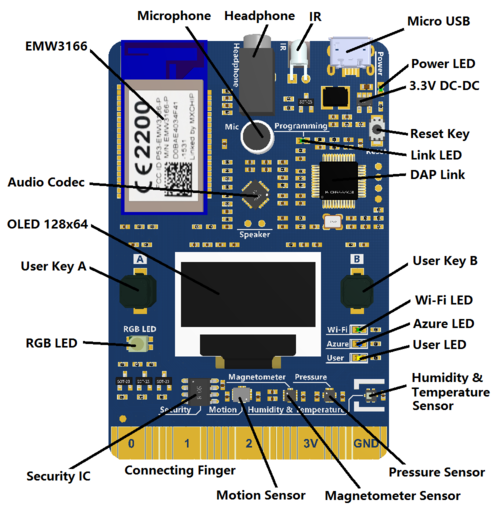
More precisely, this is a MXChip AZ1366
The Problem 🔗
I’ve been running Ubuntu 16.04 on one of my laptops, and it’s the one I had at home over the weekend. Unfortunately, the getting started guide was Windows 10 or macOS only. But I’m smart, I can figure this out quickly & get hacking, right? Well, if it had been easy, this post wouldn’t exist. Consider this a Super Unofficial and Probably Incomplete Azure IoT DevKit (1.3.1) on Ubuntu Manual Setup Guide!
Manual Installation Guide 🔗
Make sure these are all installed first
- Azure CLI
- Arduino IDE
- unzip this into
$HOME/Downloads/arduino-1.8.5
- unzip this into
- Visual Studio Code
- Node.js
That’s the basic toolset, now we need to do some configuration to add the board-specific bits so that VS Code / Arduino knows how to compile for the AZ1366.
VS Code configuration 🔗
Use Ctrl+, to open your settings.json, and add the following lines (use your own username, obviously)
  "arduino.path": "/home/noel/Downloads/arduino-1.8.5",
  "arduino.additionalUrls": "https://raw.githubusercontent.com/VSChina/azureiotdevkit_tools/master/package_azureboard_index.json"
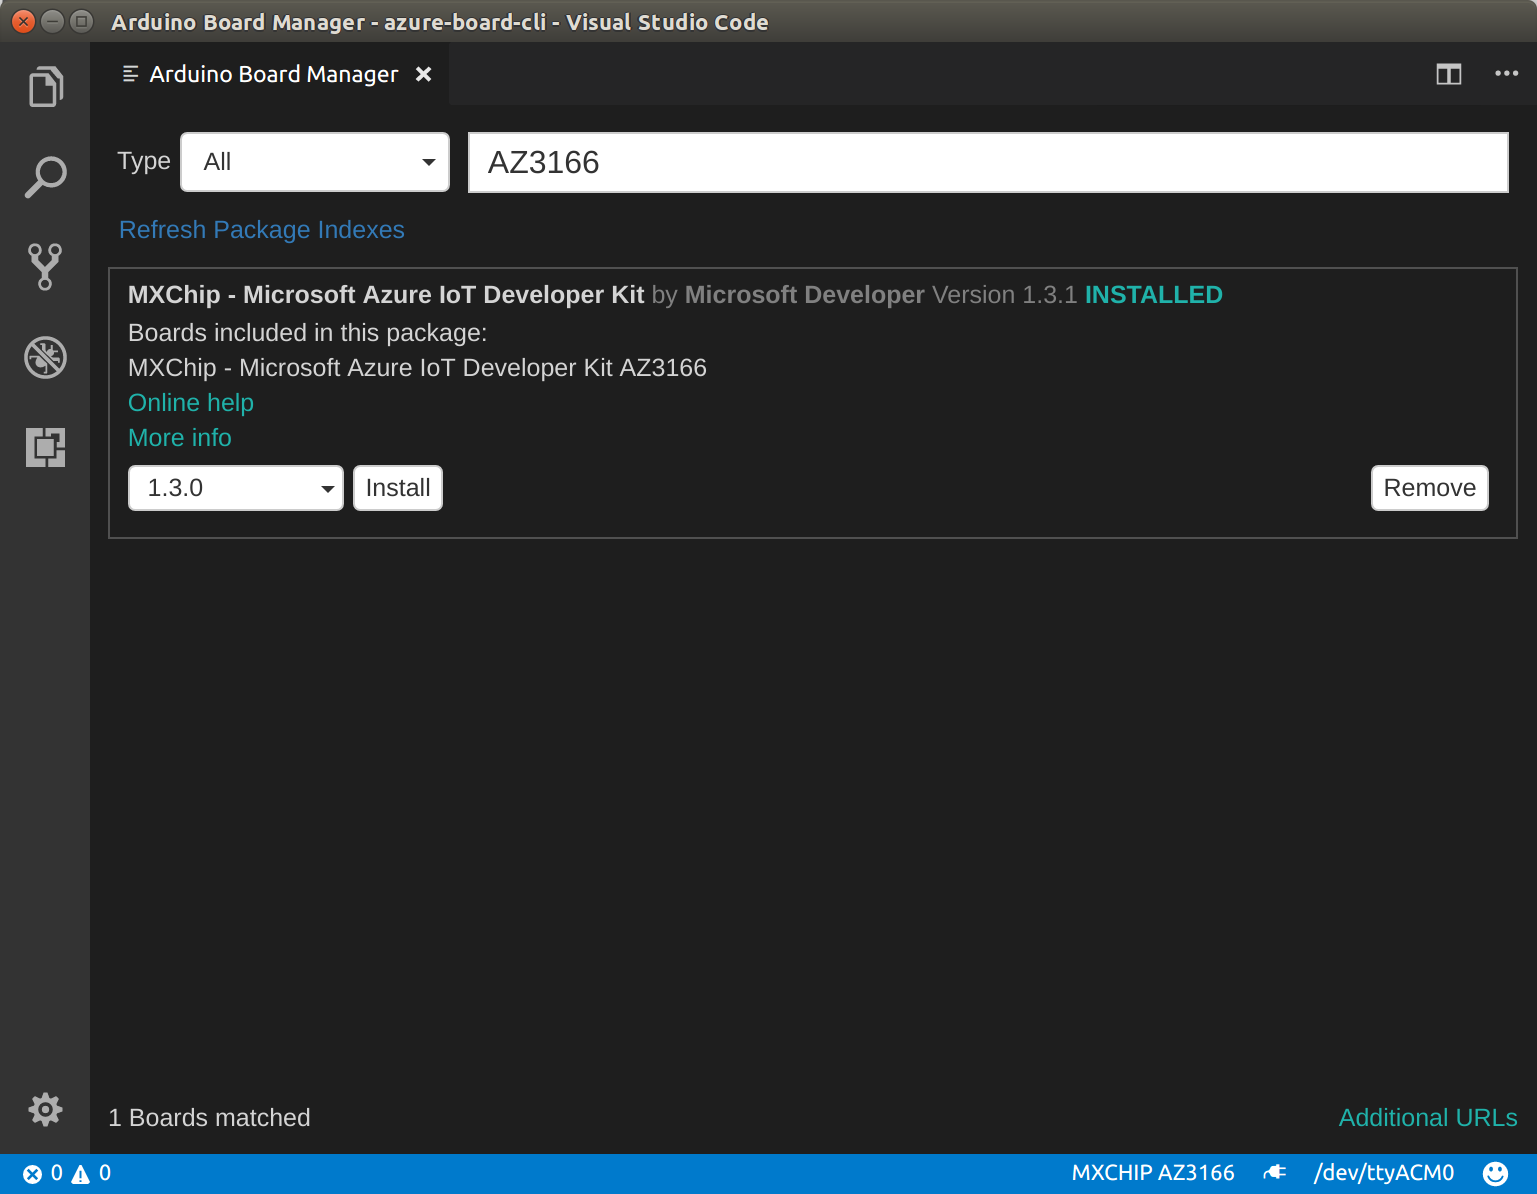
Use Ctrl+Shift+P to open the command palette, type and select Arduino: Board Manager. Search for AZ3166 and install the latest version
Linux configuration 🔗
Assuming you aren’t logged in as root (if so, shame on you!), you’ll need to do just a bit of work to allow yourself access to your device. VS Code has downloaded the bits you need in the previous step, but now we need to copy some of them around. Run the following in a terminal
# Copy the default rules. This grants permission to the group 'plugdev'
sudo cp ~/.arduino15/packages/AZ3166/tools/openocd/0.10.0/linux/contrib/60-openocd.rules /etc/udev/rules.d/
sudo udevadm control --reload-rules

# Add yourself to the group 'plugdev'
# Logout and log back in for the group to take effect
sudo usermod -a -G plugdev $(whoami)
Important! Don’t forget to logout and login for the group change to take effect!
azure-board-cli 🔗
This little Node app does all the magic of building & deploying to your IoT device. It’s a bit too magic for me… anyway, it’s written in a Windows/macOS specific way, so we need to make some updates to get it working on Ubuntu. Hopefully it will be open sourced with Linux support added, but until then, we can hack the Mac download to make it work with Ubuntu.
- Mac IoT DevKit task scripts
- Unzip these in
$HOME/azure-board-cli - Run
npm installin the folder
- Unzip these in
This app makes a hard-coded assumption that Arduino is located at /opt/arduino-1.8.3, so run the following to create a symlink to trick it
Trust me, just adding this symlink is easier than reverse engineering async ES6 code that’s been run through Babel
sudo ln -s ~/Downloads/arduino-1.8.5 /opt/arduino-1.8.3
Next, you’ll need to make some updates to handle the case where os.platform() === 'linux'. Thankfully, it’s just 3 spots and they’re all at the top of the files so they’re easy to find. Update the following files:
~/azure-board-cli/out/tasks/task-checkarduinopackage.js 🔗
if (plat === 'win32') {
     arduinoPackagePath = _path2.default.join(process.env['USERPROFILE'], 'AppData', 'Local', 'Arduino15');
 } else if (plat === 'darwin') {
     arduinoPackagePath = _path2.default.join(process.env.HOME, 'Library', 'Arduino15');
+} else if (plat === 'linux') {
+    arduinoPackagePath = _path2.default.join(process.env.HOME, '.arduino15');
 }
~/azure-board-cli/out/tasks/task-generateplatformlocal.js 🔗
if (plat === 'win32') {
     _arduinoPackagePath = _path2.default.join(process.env['USERPROFILE'], 'AppData', 'Local', 'Arduino15', 'packages');
 } else if (plat === 'darwin') {
     _arduinoPackagePath = _path2.default.join(process.env.HOME, 'Library', 'Arduino15', 'packages');
+} else if (plat === 'linux') {
+    _arduinoPackagePath = _path2.default.join(process.env.HOME, '.arduino15', 'packages');
 }
~/azure-board-cli/out/telemetry.js 🔗
if (OS_PLAT === 'win32') {
     _arduinoPackagePath = path.join(process.env['USERPROFILE'], 'AppData', 'Local', 'Arduino15', 'packages');
 } else if (OS_PLAT === 'darwin') {
     _arduinoPackagePath = path.join(process.env.HOME, 'Library', 'Arduino15', 'packages');
+} else if (OS_PLAT === 'linux') {
+    _arduinoPackagePath = path.join(process.env.HOME, '.arduino15', 'packages');
 }
Trying it out 🔗
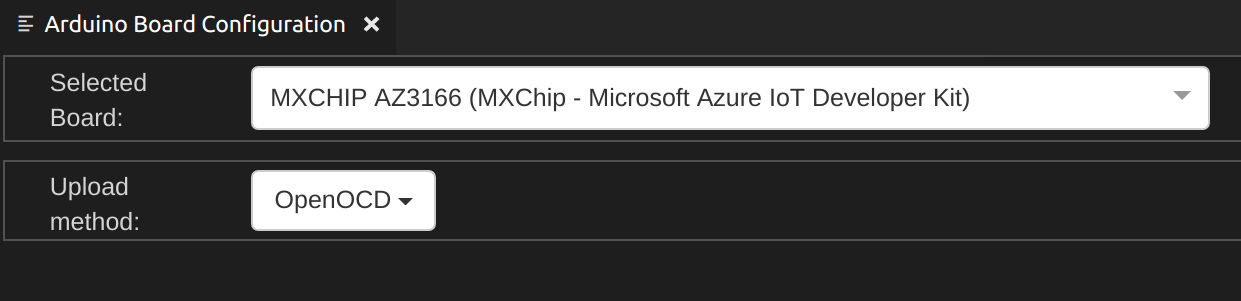
In a new VS Code window, use Ctrl+Shift+P and select Arduino: Board Manager again. In the bottom right task, bar, you’ll see some options to <Select Board Type> and <Select Serial Port>

Select the MXCHIP AZ3166 board
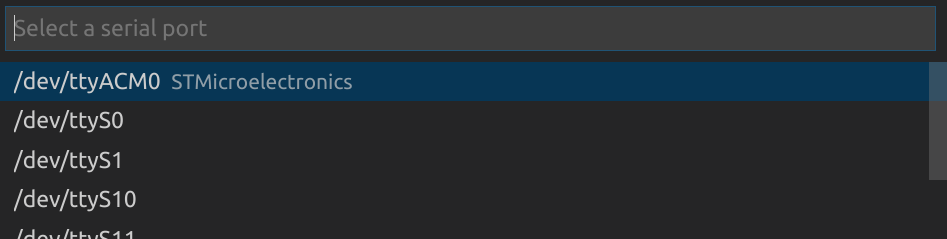
Select the serial port. The Azure IoT DevKit shows up as STMicroelectronics, usually on /dev/ttyACM0
Now that VS Code knows what board you’re using, it’s smart enough to show you the built-in examples. Use Ctrl+Shift+P again and select Arduino: Examples.
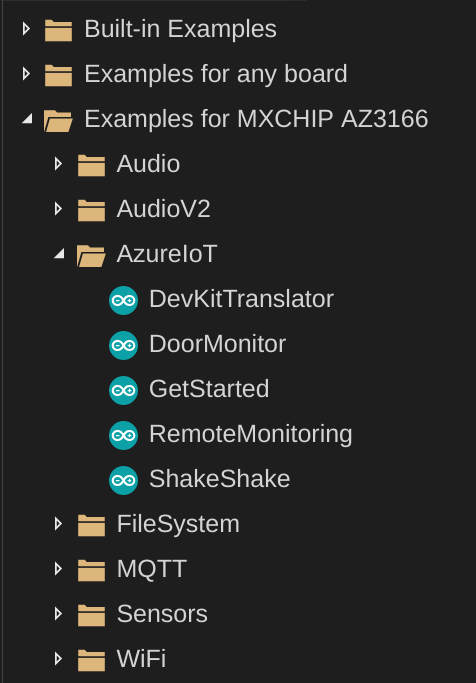
Choose Examples for MXCHIP AZ3166 -> AzureIoT -> GetStarted.
You should also be able to follow along on the official site
First, put your device into configuration mode by holding A, then pushing and releasing reset
Next, use Ctrl+Shift+P and select Tasks: Run Task, and run the following tasks:
- cloud-provision
- device-upload (see hack note if you get a Riot.h error)
Note: azure-board-cli seems brittle and can’t handle cases where you’ve changed the default output of azure-cli. If you get any errors, try running
az configureand setting the default output to JSON
Hack note! 🔗
I got an error during device-upload that complained about Riot.h being missing. I don’t really know much about C++, so I opened up /.arduino15/packages/AZ3166/hardware/stm32f4/1.3.1/cores/arduino/az_iot/provisioning_client/deps/RIoT/Reference/RIoT/Core/RiotCore.h and just commented out the include, and it worked fine… Maybe the compilers work differently on Windows/Mac so they don’t encounter the same error? Maybe the device provisioning client is super new & it’s a case of broken bits? Would love to know what the real issue/solution is here!
Troubleshooting tips 🔗
I had to learn a lot as I put this post together. Here’s some things that might be useful if (when) something goes wrong
Where’s my device? 🔗
- Use
lsusbto list your USB devices. The Azure IoT DevKit shows up asBus 002 Device 019: ID 0483:374b STMicroelectronics ST-LINK/V2.1 (Nucleo-F103RB)on my laptop - Run
ls /dev/ttyACM*to make sure your device is still connected with the same number
minicom 🔗
minicom is a friendly serial communication program. You can install it via apt-get, and talk directly to the MXCHIP AZ3166. It’s handy for setting wifi settings, seeing what’s going on with the device, etc. Here’s some tips to get started
# Installation
sudo apt-get install minicom

# Configuration
sudo minicom -l -s
Select Serial port setup and make sure that you’ve got the following set:
- A - Serial device:
/dev/ttyACM0 - E - Bps/Par/bits:
115200 8N1
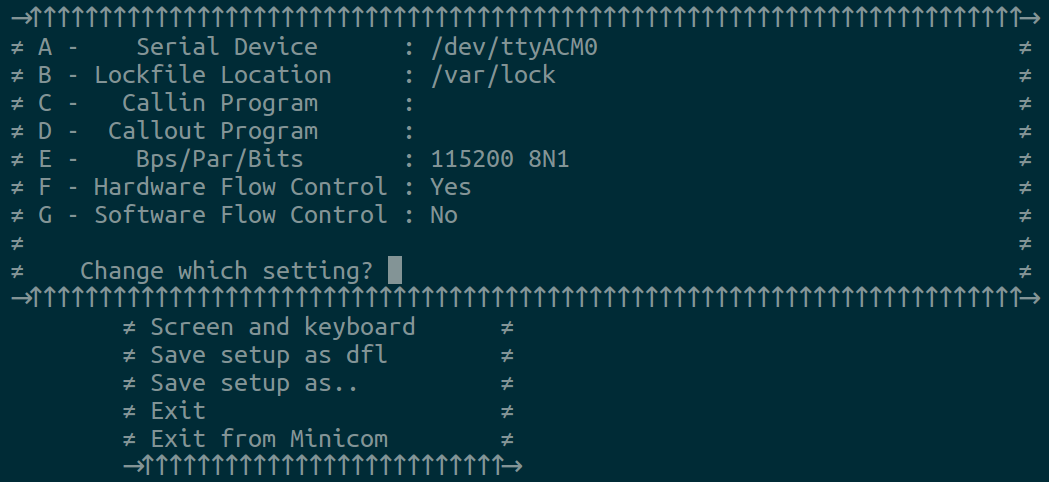
Now, you can select Save setup as dfl, then Exit minicom.
Now that it’s configured, you can run minicom. Type help when you first launch the programp and you’ll get something like the following:
Welcome to minicom 2.7

OPTIONS: I18n
Compiled on Feb  7 2016, 13:37:27.
Port /dev/ttyACM0, 19:21:54

Press CTRL-A Z for help on special keys

help
Configuration console:
 - help: Help document.
 - version: System version.
 - exit: Exit and reboot.
 - scan: Scan Wi-Fi AP.
 - set_wifissid: Set Wi-Fi SSID.
 - set_wifipwd: Set Wi-Fi password.
 - set_az_iothub: Set the connection string of Microsoft Azure IoT Hub.
 - set_dps_uds: Set DPS Unique Device Secret (DPS).
 - enable_secure: Enable secure channel between AZ3166 and secure chip.

#
Summary 🔗
This seems totally possible, and totally unsupported. If you’re excited to learn some Linux device concepts, or just insist on using Linux - give it a try! Otherwise, the happy path is definitely to use a Windows box or a Mac. If one of those describes you, I hope you’ve found this info useful!
References 🔗
I found the following links helpful when figuring this all out